Printing of firearms or firearm parts is strictly forbidden!
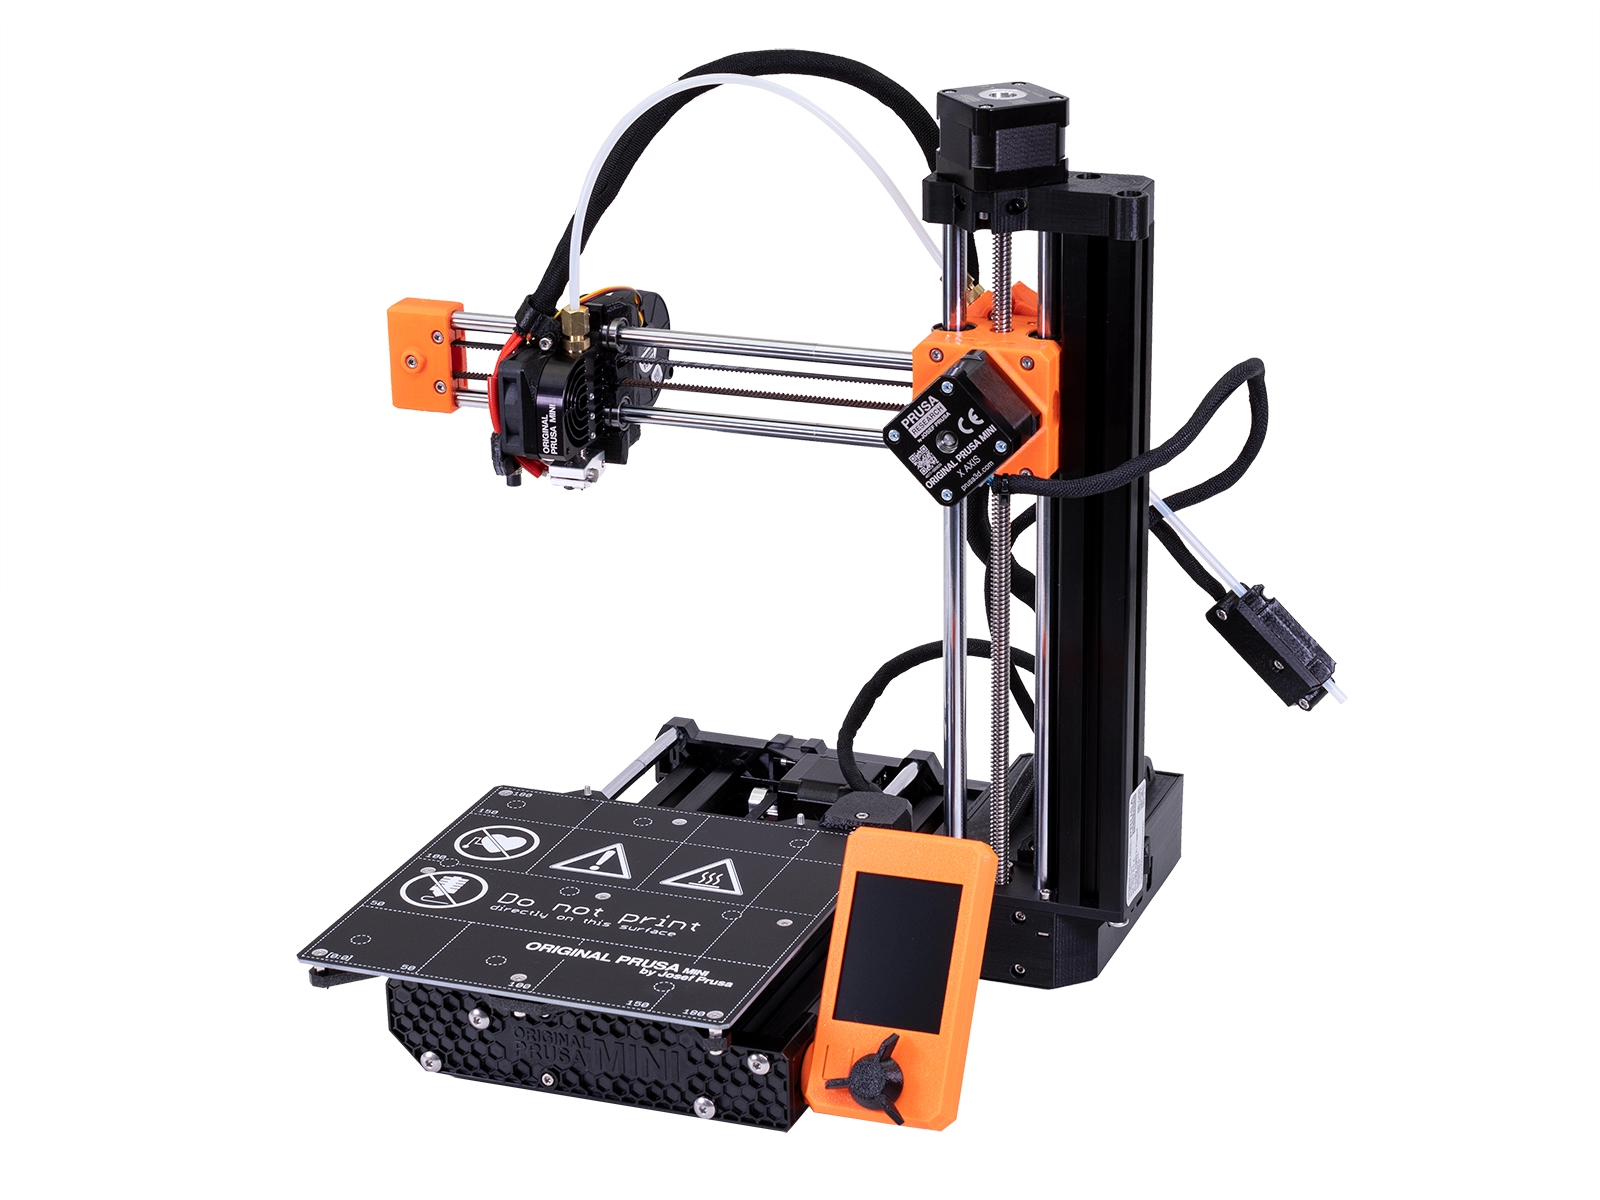
The Prusa MINI+ 3D printer heats up a filament and precisely deposits it layer-by-layer to print objects. This 3D printing is great for prototyping ideas, printing replacement parts, creating artistic pieces, printing boardgame pieces, and making many other creative ideas.
Risks
- Burn risk: Nozzle can reach temperatures up to 280°C / 536°F. Heatbed can reach temperatures up to 100°C / 212°F
- Harmful emissions: Heating plastics at 3D printing temperatures can lead to the emission of VOCs.
- Unprotected moving parts: Unprotected moving mechanical parts can cause injuries.
Glossary

- Spring steel sheet - comes in three variants: smooth, satin and textured. This is where the printed object appears.
- Heatbed - located directly under the spring steel sheet. Heatbed ensures good adhesion of the printed object. Warning: do not touch the heatbed when it’s hot!
- Y-Axis - the heatbed assembly moves along the y-axis.
- Knob and reset button - controls the 3D printer: rotate to scroll through options, press the knob to confirm your selection. There’s a reset switch directly next to the knob to perform a hard reset if you need to quickly stop and cancel a running print job.
- LCD screen - the display is used for the configuration of the 3D printer.
- Power switch - turn it off when the printer is not in use.
- USB port and microUSB port - USB port is compatible with USB 2.0/3.0 flash drives (FAT32 filesystem). Use this port to insert a USB drive with print files (G-Codes).
- Main PTFE tube - leads the filament strand from the extruder into the print head / nozzle. Inspect it from time to time to make sure there is no debris inside that would prevent the filament strand from reaching the nozzle.
- Tube fitting - on both ends of the main PTFE tube. In case filament gets stuck in the PTFE tube, use a spanner to remove the fittings and the PTFE tube to get access to the filament strand. PTFE tubes are consumables - their quality may degrade over time.
- Print fan - cools the printed object, improves print quality.
- Print head - consists of the hotend (printing nozzle), SuperPINDA probe (sensor for bed leveling and first layer calibration), and two fans.
- Nozzle - 0.4mm nozzle, can be replaced with 0.25mm or 0.6mm E3D-compatible nozzles to achieve various effects.
- Z-Axis - moves the print head vertically by moving the entire X-Axis up and down
- Extruder / Extruder motor - pushes filament through the PTFE tube towards the print head.
- X-Axis - allows the movement of the belt-driven print head from left to right.
- Spool holder - should be placed near the printer, so the filament strand can enter the PTFE tube from below. Filament must not bend at an acute angle.
Materials
The Prusa MINI+ can be used to print with the following filament materials: PLA, PET/PETG, ASA, ABS, PC (Polycarbonate), CPE, PVA / BVOH, HIPS, PP (Polypopylene), Flex, nGen, PA (Nylon), Composite materials, Woodfill PLA, and Metalfill PLA (requires hardened steel nozzle). For a full breakdown of supported materials, see Prusa's material comparison.
Below is a brief comparison of a few common filaments. When working with an unfamiliar material, use a material-specific guide to ensure proper headbed adhesion and to avoid damaging the printer.
PLA: Most common 3D printing material. Easy to work with. Very detailed. Printed model is hard, but brittle and inflexible. Low temperature and UV resistance. Best printed on the smooth sheet. Post-process with wet sanding if you want a smooth surface. Connect PLA pieces with superglue or acetone.
Typical uses: prototypes, toys, figures, jewelry, architectural models
PETG: Has higher temperature resistance and is less brittle than PLA. Great choice for mechanical parts. Easy to print. Tough and durable. Not suitable for small/detailed models. Satin and powder-coated sheets require no preparation. For smooth or textured sheets, apply a thin layer of glue stick. Post-process with sanding.
Typical uses: mechanical components, holders and cases, watertight prints (e.g. pots)
ASA: Has higher temperature and UV resistance. High impact and wear resistance. Difficult to print (prone to warping if not printed in enclosure). Satin sheets require no preparation. For smooth/textured sheets, apply a thin layer of glue stick. Post-process with sanding or cutting. Easy to glue together as it's soluble in acetone.
Typical uses: covers, protective cases, prototypes, replacement parts, toys & figures
Procedures
Printing a model
You can obtain models from online sites (e.g. Printables, Thingiverse) or you can create them on your own with a 3D editor (e.g. Tinkercad, OnShape, Blender).
Take your 3D model and convert ("slice") it to GCode using software like PrusaSlicer. If you are not familiar with PrusaSlicer, see First Print with PrusaSlicer in the PrusaSlicer documentation.
- Select a steel sheet that is appropriate for the material you are printing.
- Ensure the steel sheet is clean of filament, dirt, grease, fingerprints, etc. Gently clean with Isopropyl alcohol wipes if needed.
- Attach the steel sheet to the heat bed. If the material you are printing with requires it, apply a layer of glue stick to the steel sheet.
- Power on the 3D Printer
- Copy the
.gcodefile to a USB drive, and insert the USB drive into the 3D Printer - Using the 3D printer control panel, select the model you wish to print.
- The printer will perform Mesh Bed Leveling, preheat the nozzle, and print a skirt around the object before starting to print your object.
- Pay close attention to the quality of the first layer. The plastic should stick to the steel sheet. If the nozzle is to high, try to lower it with the Live Adjust Z function in the Tune menu while printing, or stop the print, clean the sheet, re-run First Layer Calibration, and restart your print.
- Allow printing to continue until complete. Printing may take several hours.
Removing the model
Try to avoid touching the steel sheet surface with your fingers as fingerprints can decrease adhesion of the next print.
- Wait for the heatbed to cool down
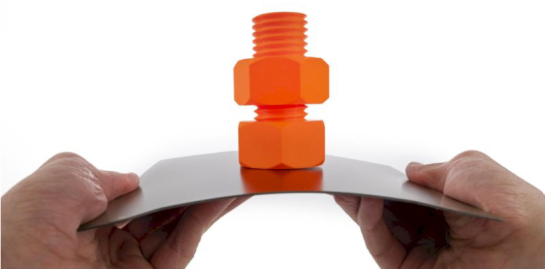
- If your print does not automatically detach when cooled, lift the steel sheet, and carefully bend it inward and outward as seen in the photo below
- Remove all leftover pieces of filament (e.g. purge line, skirt, and supports)
Unload filament
- Power on 3D printer
- Choose LCD Menu - Filament - Unload filament
- Printer will preheat the filament and beep to notify you when preheating finishes
- Press control knob to start unloading
- Once the extruder gears stop unloading filament, pull the filament out from the PTFE tube manually.
- Store any leftover filament in an airtight container (to reduce moisture absorption)
Load filament
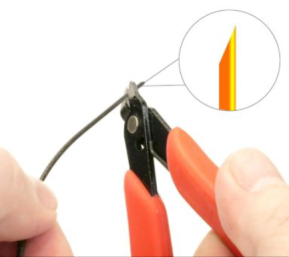
- Cut the end of the filament to create a sharp tip
- Insert the filament into the short PTFE tube of the filament sensor.
- Push the inserted filament up into the extruder
- Power on 3D printer
- Choose LCD Menu - Filament - Load filament
- Select the type of filament you have inserted into the PTFE tube
- Wait for the nozzle to reach the target preheat temperature
- Press the control knob to start loading and push the filament into the extruder until the extruder drive gears grab the filament
- The printer will automatically load the filament into the print head and prompt you to confirm if the color extruded from the print head is the correct color (in case the extruded plastic is contaminated by the previous filament). Select "no" to push more material out of the nozzle. Select "Retry" to repeat the loading process.