The SawStop safety system is designed for use with standard 10 inch blades with kerfs from 3/32 inch to 3/16 inch. Blades with kerfs much thinner than 3/32 inch should not be used because those blades might not be strong enough to withstand the force applied by the brake when it activates.
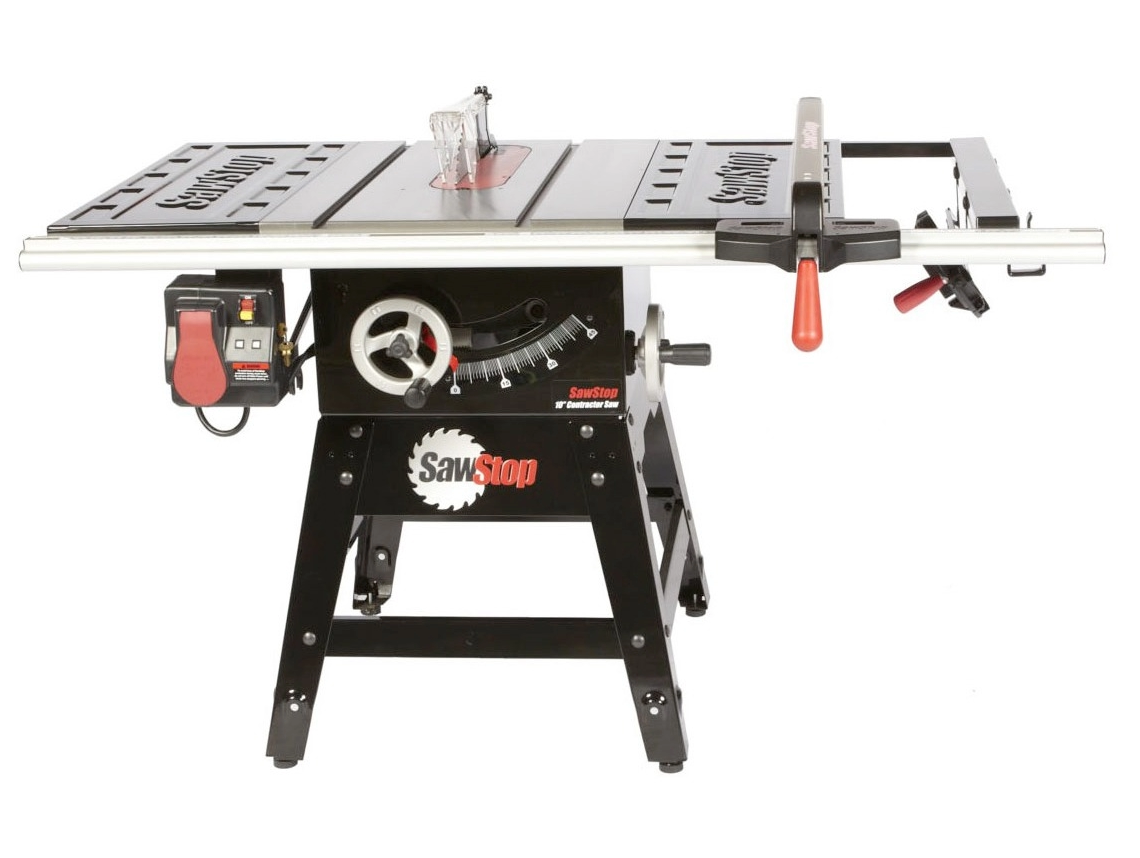
The SawStop Table Saw cuts wood and other materials, and can be used for a wide range of projects, from furniture building to construction work.
Risks
While the SawStop Table Saw has advanced skin detection technology that greatly reduces the risk of injury, it does not fully eliminate risks.
- Serious physical injury from cuts or amputations from the saw blade
- Fire hazard from sawdust buildup or improper use of saw
- Kickback risk from improper use of saw or dull blade
- Electrical shock hazard from damaged or frayed power cord
- Eye injury from sawdust or flying debris
- Hearing damage from long-term exposure to saw noise
Safety Precautions
- Wear PPE including eye and ear protection, dust mask, and leather apron. SawStop recommends against wearing gloves since the glove could snag on the blade and pull your hand into the blade faster resulting in a deeper cut before the blade brake engages.
- Avoid loose clothing or jewelry that may dangle near the saw blade (e.g. Hoodie draw strings) when operating the table saw.
- Use the safety features. In most situations, skin detection should remain enabled, and the blade guard should be installed.
- Turn off the saw when making adjustments. All adjustments must be performed when the saw is off. And the saw must be unplugged to perform adjustments that put you in close contact with the blade (e.g. changing the blade or brake)
- Ensure saw is safe to use. Do not use if any of these problems are present:
- Cracked, dull, or improperly filed blade
- Blade has gum sticking to the sides
- Unintended fence or table movement
- Use proper techniques
- Stand out of the way of kickback
- Never reach over the blade to remove waste or off-cuts while the blade is moving.
- Use the riving knife and a featherboard or jig when not using the standard blade guard.
- Use a push stick or push block for cuts less than 3" wide.
- Avoid very narrow cuts between the blade and fence (high risk of binding and kickback).
Glossary
- Blade: The circular saw blade that rotates and cuts the material.
- Dado Set: a blade set of blades on either side of a set of removable knives or chippers. You can use a dado set to cut a groove or slot in a workpiece.
- Fence: An adjustable guide attached to the saw's table that helps ensure the material is cut straight.
- Miter Gauge: An adjustable gauge that fits into the slots on the table to allow for making angled cuts.
- Push Stick: A device used to push the material through the blade, keeping hands away from the blade.
- Riving Knife or Spreader: A device that helps prevent the material from binding on the blade and reduces the risk of kickback.
- Kickback: A dangerous condition that occurs when the material is violently thrown back towards the user.
- Anti-kickback Pawl - A device that blocks the material from moving backward if kickback occurs.
- Blade Guard: A clear plastic guard that covers the blade, helping to reduce the risk of injury.
Materials
The SawStop Table Saw is capable of cutting through a wide range of materials including:
- Softwoods (e.g. Pine, Fir, Cedar)
- Hardwoods (e.g. Oak, Maple, Cherry)
- MDF (Medium-density fiberboard)
- Plywood
- Particleboard
- Laminate
- Plastic
It is important to choose the correct blade for the material being cut, and to make sure the blade is sharp and in good condition to ensure a clean and safe cut.
Procedures
Changing the blade
- Turn off and unplug the saw.
- Remove the insert, loosen the blade arbor nut with the wrench provided, and remove the blade.
- Clean the arbor and blade flanges to remove any buildup or debris.
- Install the new blade or dado set and reinstall the arbor washer and arbor nut.
- For dado widths larger than 3/8 inch, do not use the arbor washer. Instead, tighten the arbor nut directly against the dado set.
- If switching between blade and dado set, you'll need to also switch the brake cartridge and insert as there are specific brake cartridges and inserts for dado sets.
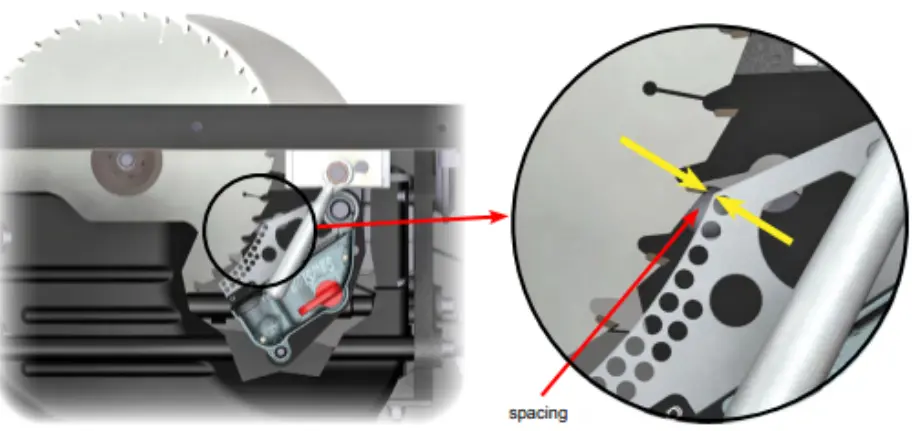
- Adjust the brake cartridge position. Using an 8mm hex key, turn the brake positioning bolt to change the spacing
between the brake cartridge and the edge of the blade. Set the spacing between the teeth of the blade and the closest point on the brake cartridge between 1/16 and 3/32 inch using the spacing adjustment gauge (or a US nickel).
- Rotate the blade by hand at least one complete revolution to ensure that the blade does not contact the brake.
- Reinstall the insert and blade guard or riving knife.
- Check the blade again for alignment before plugging in the saw and resuming use.
Replacing the brake cartridge
- Turn off and unplug the saw.
- Remove the insert, loosen the blade arbor nut with the wrench provided.
- Remove the cartridge key by turning it 90° clockwise and pulling it away from the cartridge. Then remove the blade and brake cartridge.
- To install the new brake cartridge, align the mounting holes in the cartridge with the pivot pin and positioning pin in the saw. Slide the cartridge onto the pins until the cartridge rests against the mounting bracket.
- Insert the cartridge key into the hole in the cartridge housing, and rotate the key 90° counter-clockwise to lock the cartridge in place.
- To complete the installation, the brake cartridge must be correctly positioned relative to the blade or dado set. Once the brake cartridge is installed, fully rotate the blade guard clamping handle counter-clockwise to lock the spreader or riving knife in place.
- Install the blade or dado set as described in the Changing the Blade procedure.
- If the system does not start or flashes an error code, then the brake is not installed properly.
Note: Always use only SawStop brake cartridges for the saw. Using unauthorized cartridges may cause injury or death.
Crosscutting
- Choose the correct blade. Crosscutting blades usually have more teeth (typically 60-80) to cut across more wood fibers while making clean, finished cuts.
- Adjust the blade height so that it extends about 1/8 inch above the material to be cut.
- If making a bevel cut, tilt the blade using the saw's bevel adjustment.
- If using the fence for sizing your crosscut, insert a separaor block between the fence and the piece to be cut, and adjust your measurements accordingly when setting and securing the fence.
- Check for debris, and remove any sawdust, wood chips, or other debris that could interfere with the cut.
- Turn on the saw, and wait for it to reach full speed before making the cut.
- Make the cut. Stand to the side of the blade and push the material through the blade with a smooth and even feed rate using the miter gauge or a crosscut sled.
- Turn off the saw, and wait for the blade to come to a complete stop before removing the material from the table.
- Clean up the table saw and the surrounding area, and dispose of any debris properly.
Ripping
- Choose the correct blade. Rip blades usually have fewer teeth (typically 24-30) to cut with the grain and the larger space between teeth ensures that sawdust is evacuated quickly.
- Adjust the blade height so that it extends about 1/8 inch above the material to be cut.
- If making a bevel cut, tilt the blade using the saw's bevel adjustment.
- Set the fence to the desired distance from the blade. Make sure the fence is parallel to the blade and secure it in place.
- Check for debris, and remove any sawdust, wood chips, or other debris that could interfere with the cut.
- Turn on the saw, and wait for it to reach full speed before making the cut.
- Make the cut. Stand to the side of the blade and push the material through the blade with a smooth and even feed rate. Use a push stick or similar to help guide the material through the blade and keep your fingers away from the blade.
- Turn off the saw, and wait for the blade to come to a complete stop before removing the material from the table.
- Clean up the table saw and the surrounding area, and dispose of any debris properly.
Jointing
Ripping a board does not create a perfectly smooth, straight edge unless the edge along the fence is also perfectly smooth and straight. Jointers are used to create one such straight edge, but it is also possible to joint on the table saw using a jointing jig.
Coming soon... procedure for jointing with the table saw